Bicycle bags using backpacks
Posted on September 5, 2004

Backpacks as bicycle panniers can work really well. They are cheap, plentiful, and of good quality. You could even dismount them and carry them on your back.
It was an easy decision for me to get backpacks instead of shelling out some money for proper panniers, but there are concerns. Since they are not designed as panniers, how could I mount them on the bike? They are also usually tall, likely disturbing the rear derailleur.
Originally I wanted to make bags like I did previously, but the idea was dropped because I could not find proper material to make it. It would be too time consuming anyway. When I walked past a shop and saw backpacks on sale, I bought them without a second thought. I got some Velcro strips and a large poster board.
The last pair of bags I made was a half success because there was only one pocket on each, making them slightly inconvenient to use. They did not have a flat back, causing them to rub against the wheels. In this version I tried to make a stronger back. I also wanted to make these bags usable as backpacks, so the modifications I make should either be undoable or unnoticeable.
Construction
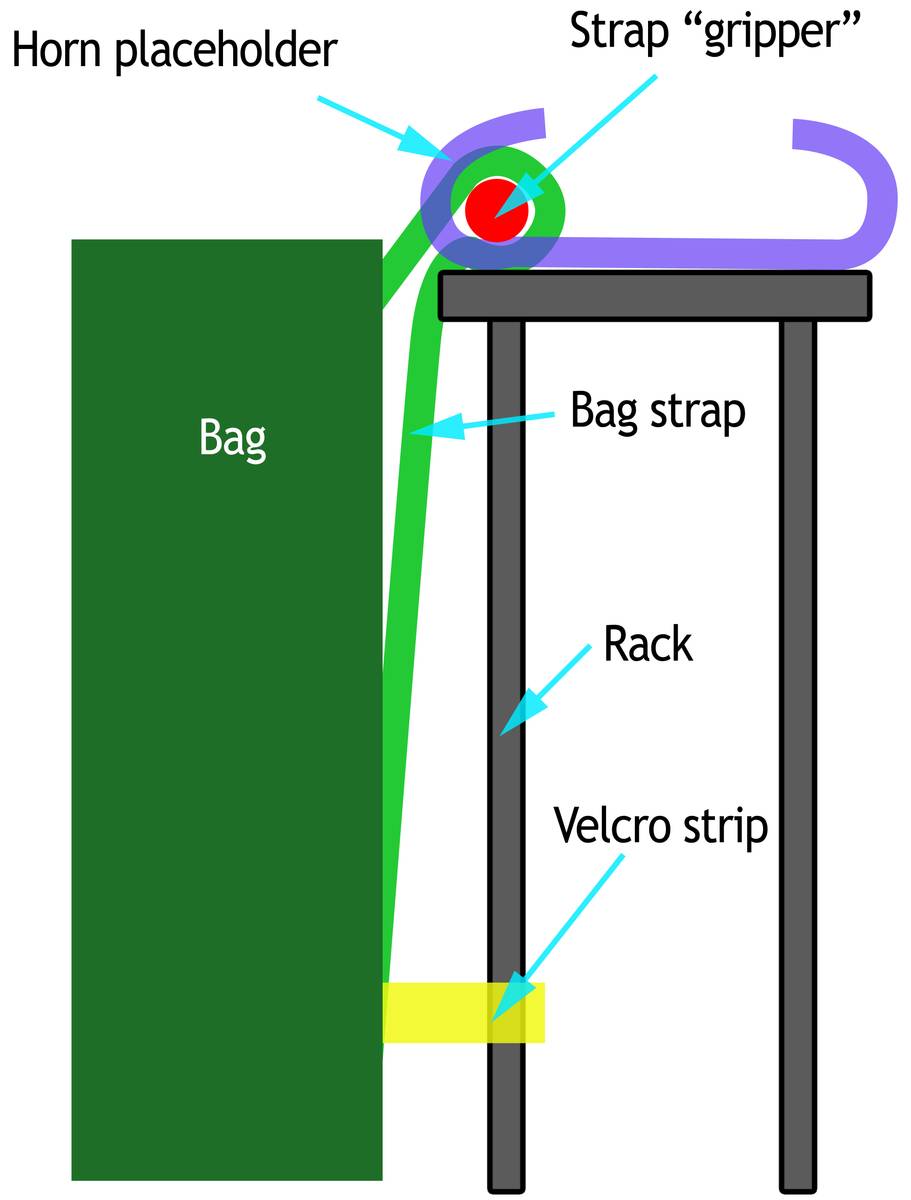
Figure 1 Diagram showing how the "horns" hold the straps onto the rack
First, I used some leftover steel rods and bent it into the shape of a "horn" using a hammer. Then I tied them to the rack using some zip ties. Zip ties may seem too weak to hold payloads of 20kg, but the weight will be borne by the "horn" placeholder, not the zip ties.
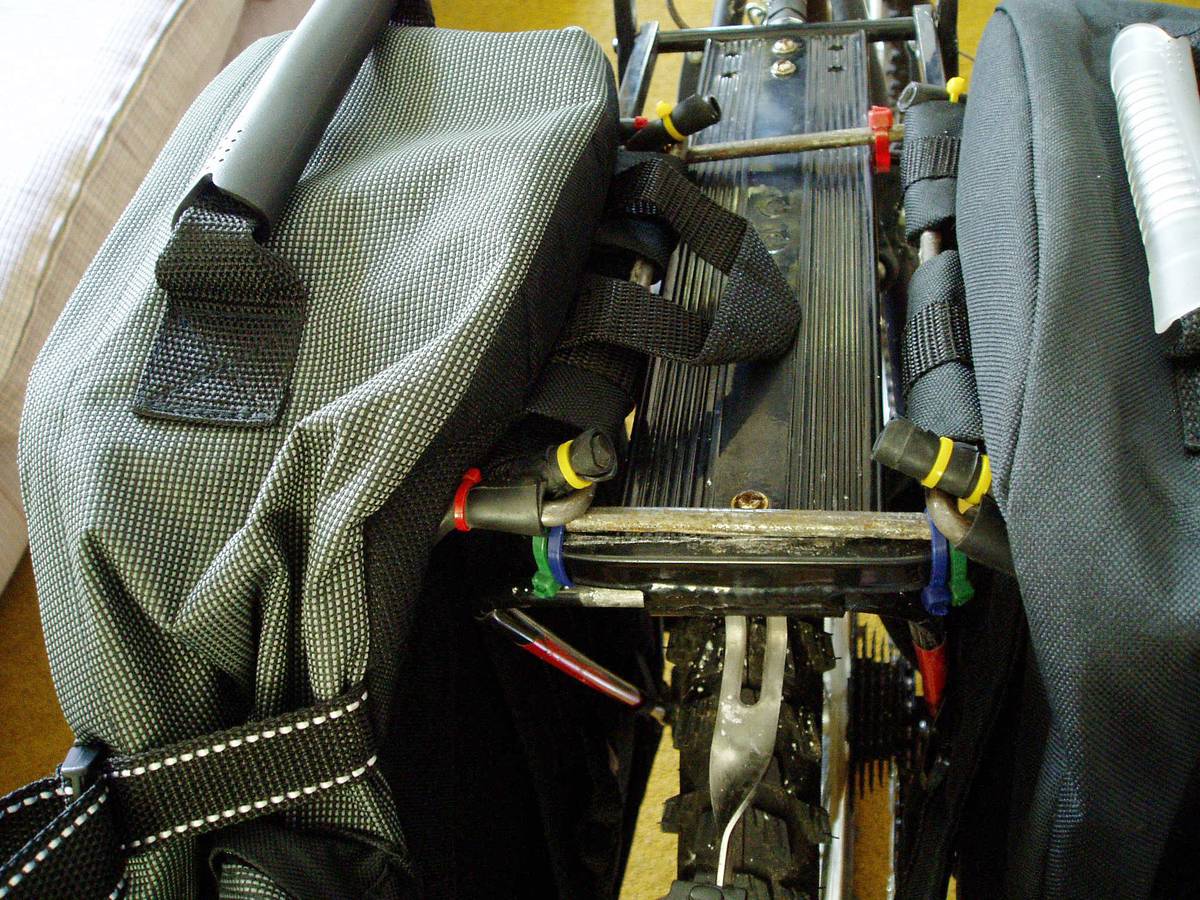
Figure 2 Straps get squeezed between the grippers and the rack to create a secure hold on the bag
The steel rods had rough ends. Not willing to buy a file to smooth it out, I wrapped the rod ends with strips of inner tubes. They serve an additional purpose: to cushion the contact between the "horns" and the "grippers".
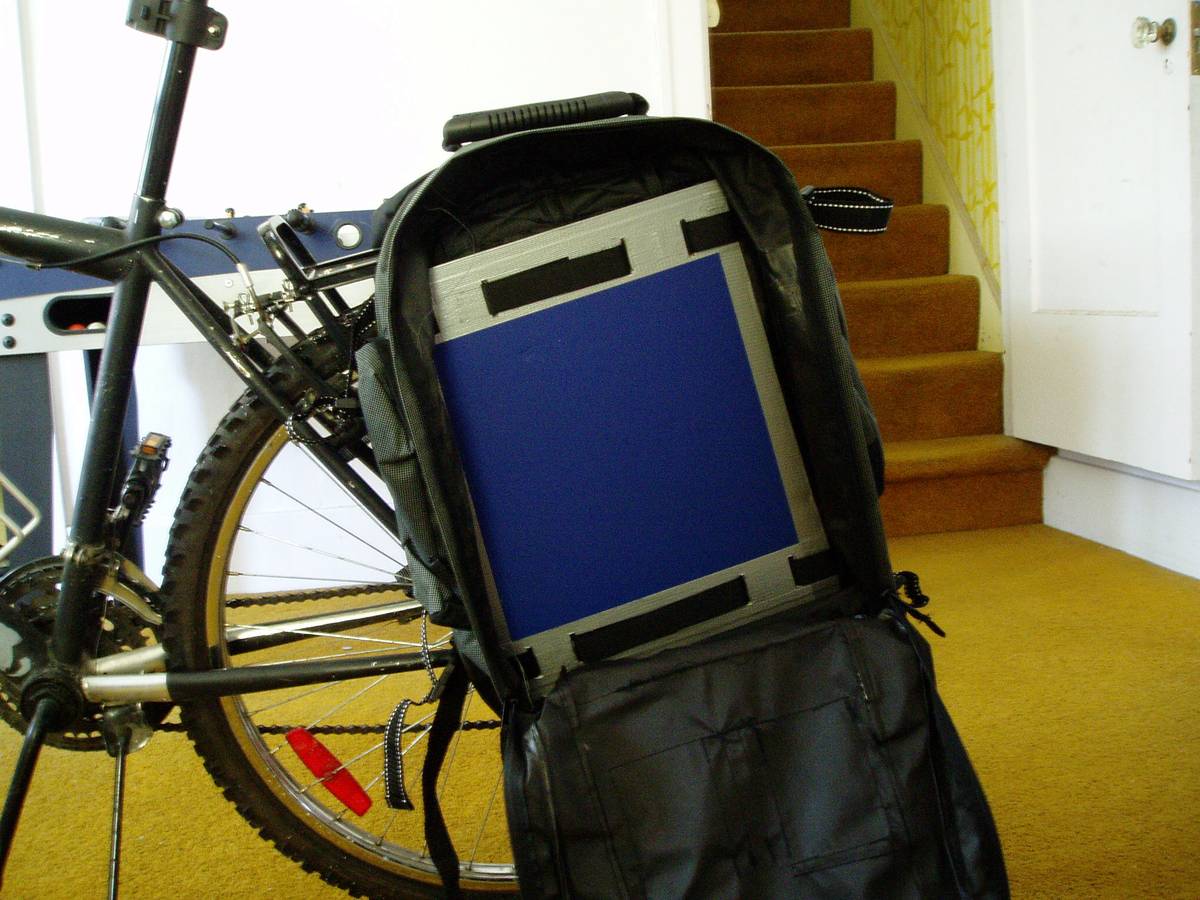
Figure 3 Poster boards held onto the back of the backpack creates a stiffer back
To stiffen the backs of the bags, I used a polyester poster board, which is lightweight, waterproof and hard enough (not durable though, as we'll see in further down). This will compromise the comfort of the bags when they are used as backpacks, so I made them removable. To prevent the edges of the boards from being worn down, I duct taped the edges.
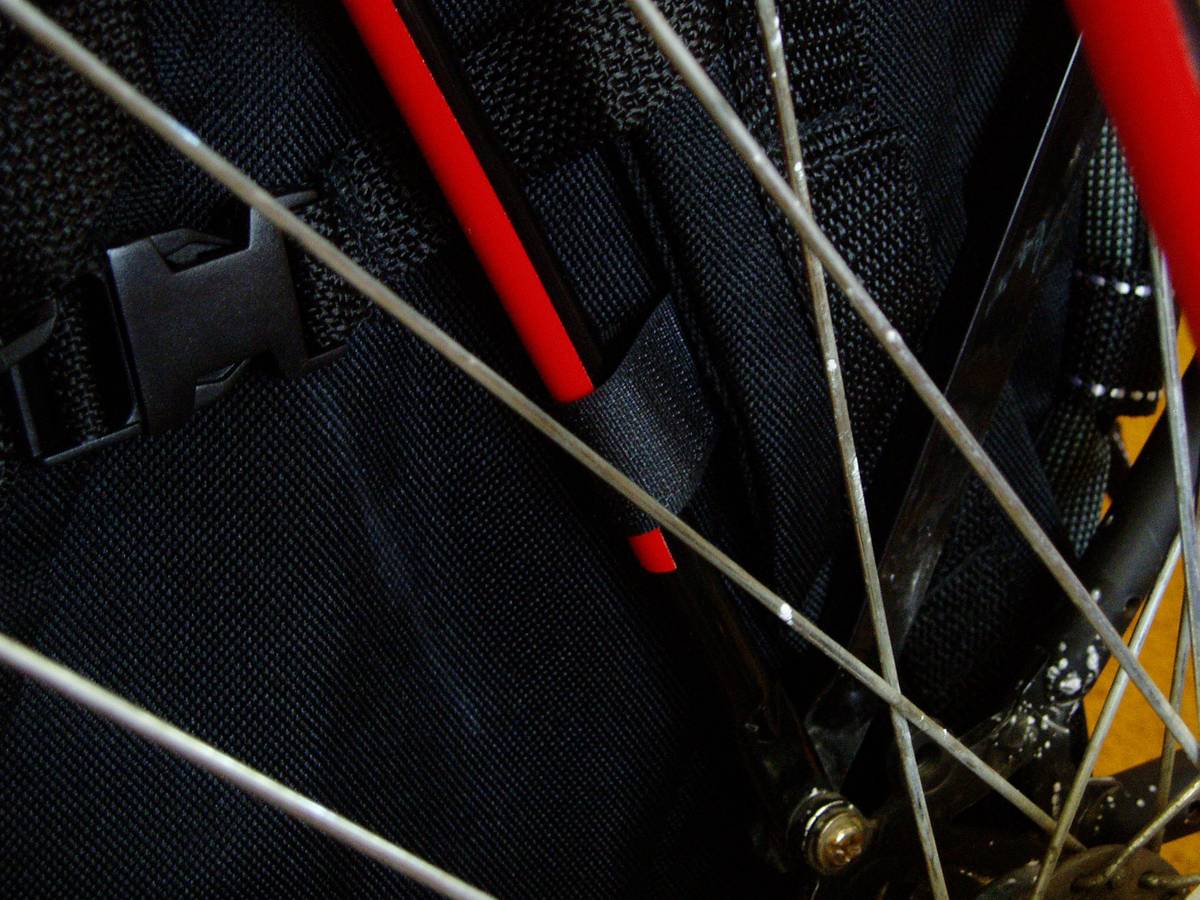
Figure 4 Velcro straps sewn onto the bottom of the bags hold the bags onto the rack
I do not have particularly big feet, but my heels may still hit the bags when I pedal. The bags can sway outwards, hampering balance and handling. Making sure the bags are removable, I sewed Velcro strips onto the bag and tied it around the rack.
To prevent the straps on the bag from getting caught in the wheel, I sewed short strips of Velcro on the straps and the bag to hold them together.
Use
I put the system to a good test – through a 400km bike ride.
They worked surprisingly well. I was able to dismount one of the bags, hide my water jug inside and sneak into a library to get water. With so many pockets, I put frequently used items (lights, map, and camera equipment) in them, making the ride easier and more convenient. The poster board showed its weakness – a corner folded due to a pull caused by a 2.5 litre water jug.
They do not work that well without load. With only one bag attached, the pull on the "horns" became imbalanced. The bags were not secure due to the absence of downward pull. Without load, the straps on the bags are longer, making it difficult to secure straps onto the bags and prevent them from getting caught in the wheel. This has happened several times.
It's great for grocery shopping because they are removable. It did take a while to cramp a lot into two relatively small bags. All the weight can crush some more fragile items. Figuring out what goes to the bottom and what goes to the top can be time consuming. However, being able to bring them into the kitchen by simply dismounting them is a big plus.